Sunday, January 29, 2012

Love Pillow FINISHED... and how I put it all together

Well it has been a long time coming (relatively for me) but I finally got this pillow finished.   I am an impatient sewer- I like to have things done and they nag at me mentally when things go unfinished.  I am just not the type to have several WIPS at one time, never have been one to read more the one book at a time- just not that girl.  I digress... So this week has been crazy hectic- and I haven't had any time until last night to get to work on this pillow... I get very cranky when denied sewing time too long and my lovely BF actually told me to get it done so I could be happy again.... (who Me?)  I promised I would show you all how I put my quilted pillows together- but realized quickly that this is not my favorite way to put them together, but my second favorite.  I really HATE sewing on binding- so my favorite method only uses binding on the envelope closure and not on the edges.  But this pillow being whole cloth really needed a nice binding frame I thought, so I suffered through sewing it all on there to get her done.  Overall I am very pleased with the result.  I will show you how I made it but please keep in mind this is only my second favorite pillow method... I will make another pillow soon to tell you about my favorite method- which is more innovative and bottom line easier.... so stay tuned for that.
fat quarter cut in 2 pieces for the envelope closure

muslin strip sewn to the thinner side to make the closure overlap properly

quilt sandwich- love the cherry insides!

big panel quilted

smaller panel quilted

making the binding strips

pinning the binding to the right side first and then using a quarter inch seam sewing it down

press it down flat

fold over to the wrong side and press again

secure with binding clips and stitch in the ditch on the front side

don't forget to use lots and lots of clips- the more the better, and sew slow!

all finished, without pillow form

the back with no pillow form

the back all stuffed with pillow form

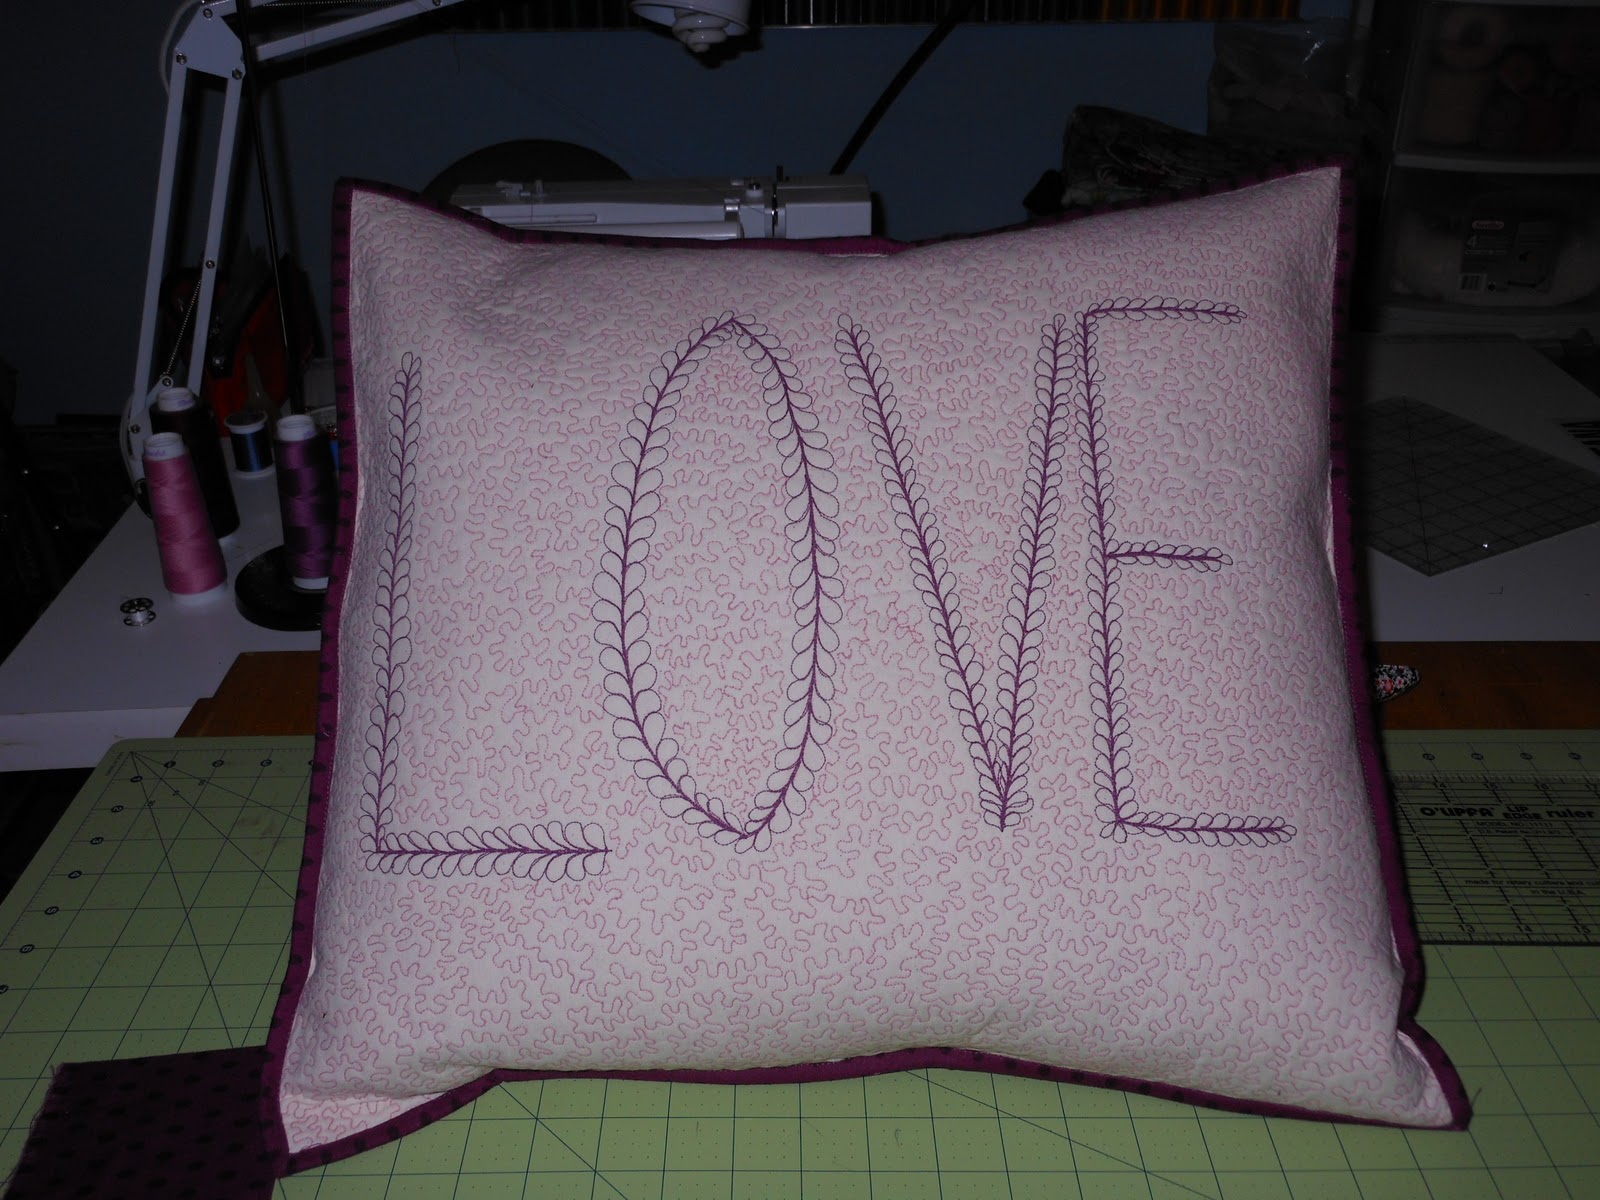
and the front all stuffed and ready to squeeze!
First I cut my back pieces (top piece, batting and bottom piece) in 2 rectangles.  Here I used a fat quarter for the back but it didn't overlap enough as my pillow is around 18" square.  So I took a strip of muslin and sewed it to the end which would hide in the envelope.  I like my envelope closures to overlap by around 6"  This one ended up being more like 7" which made it a bit hard to stuff.  Once I have those pieces all cut and sandwiched I quilted them with a meandering stipple.  Next I sewed binding to the edges of the pieces on the sides that would overlap.  I did this by machine sewing the binding to the right side, and then pressed the seam to the back and used lots of binding clips to secure them.  Then I carefully and slowly stitched in the ditch on the front side again to secure it to the back.  My binding strips were 2" wide (before folding in half) and using a quarter inch seam I was able to do this without any trouble.  This might be tricky for those not well versed in machine sewing binding to both sides of their projects.  Good pressing and lots of binding clips work well for me, but if you have trouble with this then hand sewing on the back side is another good option.  Once my pieces were bound I overlapped them and put my front piece on top of the wrong side and squared them all up.  I then zigzagged all around the edges to make them very secure and also nice and flat.  I then used the same binding method to sew the binding to the outer edges of the pillow.  I only had a few gaps that didn't quite catch in the stitch in the ditch step- those I hand sewed down.  I then stuffed with my pillow form (goose down on this one) and VOILA- all finished, love that LOVE pillow!

3 comments:

  1. Nice tutorial , great picture. Love the contrast of the fabrics. Beautiful effect. My birthday is coming up soon!!!!!!!!

    ReplyDelete
    Replies
    1. thanks so much mom- I was hoping the tutorial made sense- I am not used to explaining things yet, but hopefully will get better at it. Your birthday is coming up very soon, we will just have to see what the birthday fairy brings you!!

      Delete
  2. Your pillow looks great! Perfect subject for Valentine's Day!

    ReplyDelete