Tuesday, January 31, 2012

Work in Progress Wednesday #3 and a WINNER!

Well it's Wednesday again, which is quickly becoming one of my favorite days of the week thanks to Lee's Work in Progress Wednesday and all the great new blog friends I am making by linking to it.  This week was a bit more generous with the sewing time and I was able to get one thing done and make some very good progress on another.  Lets see what happened.

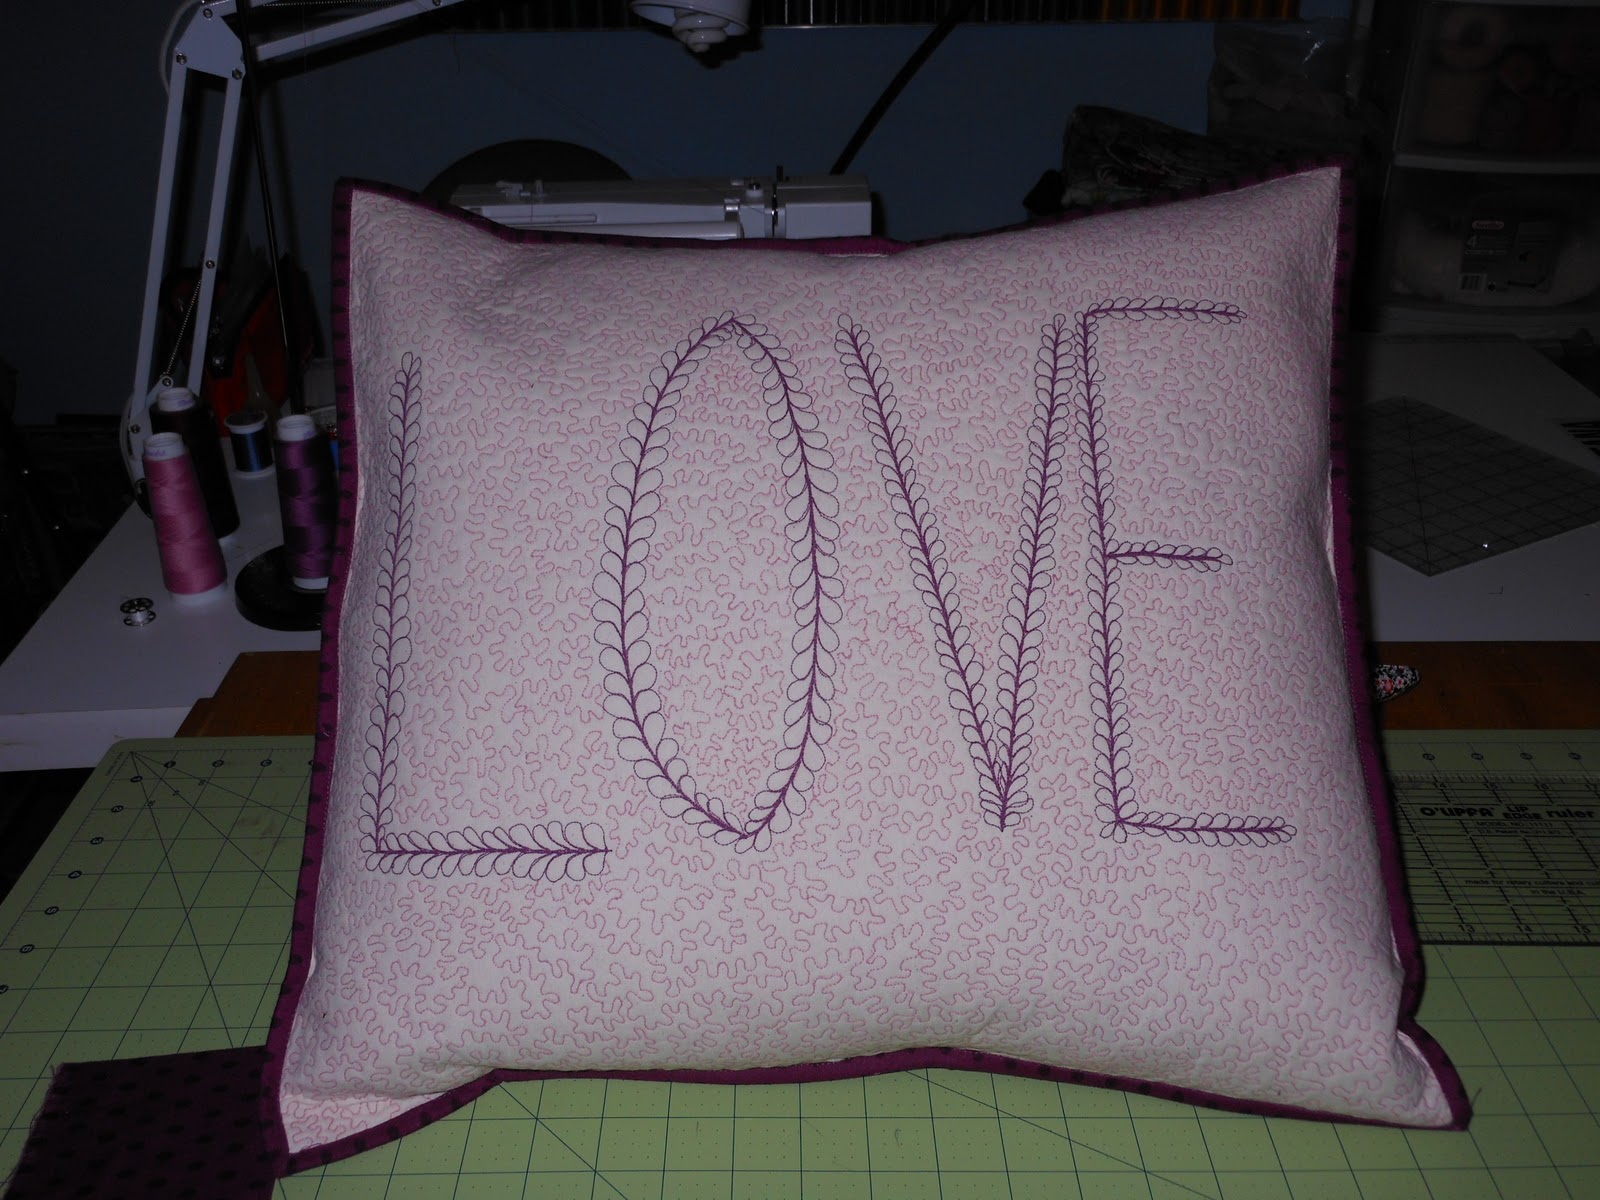
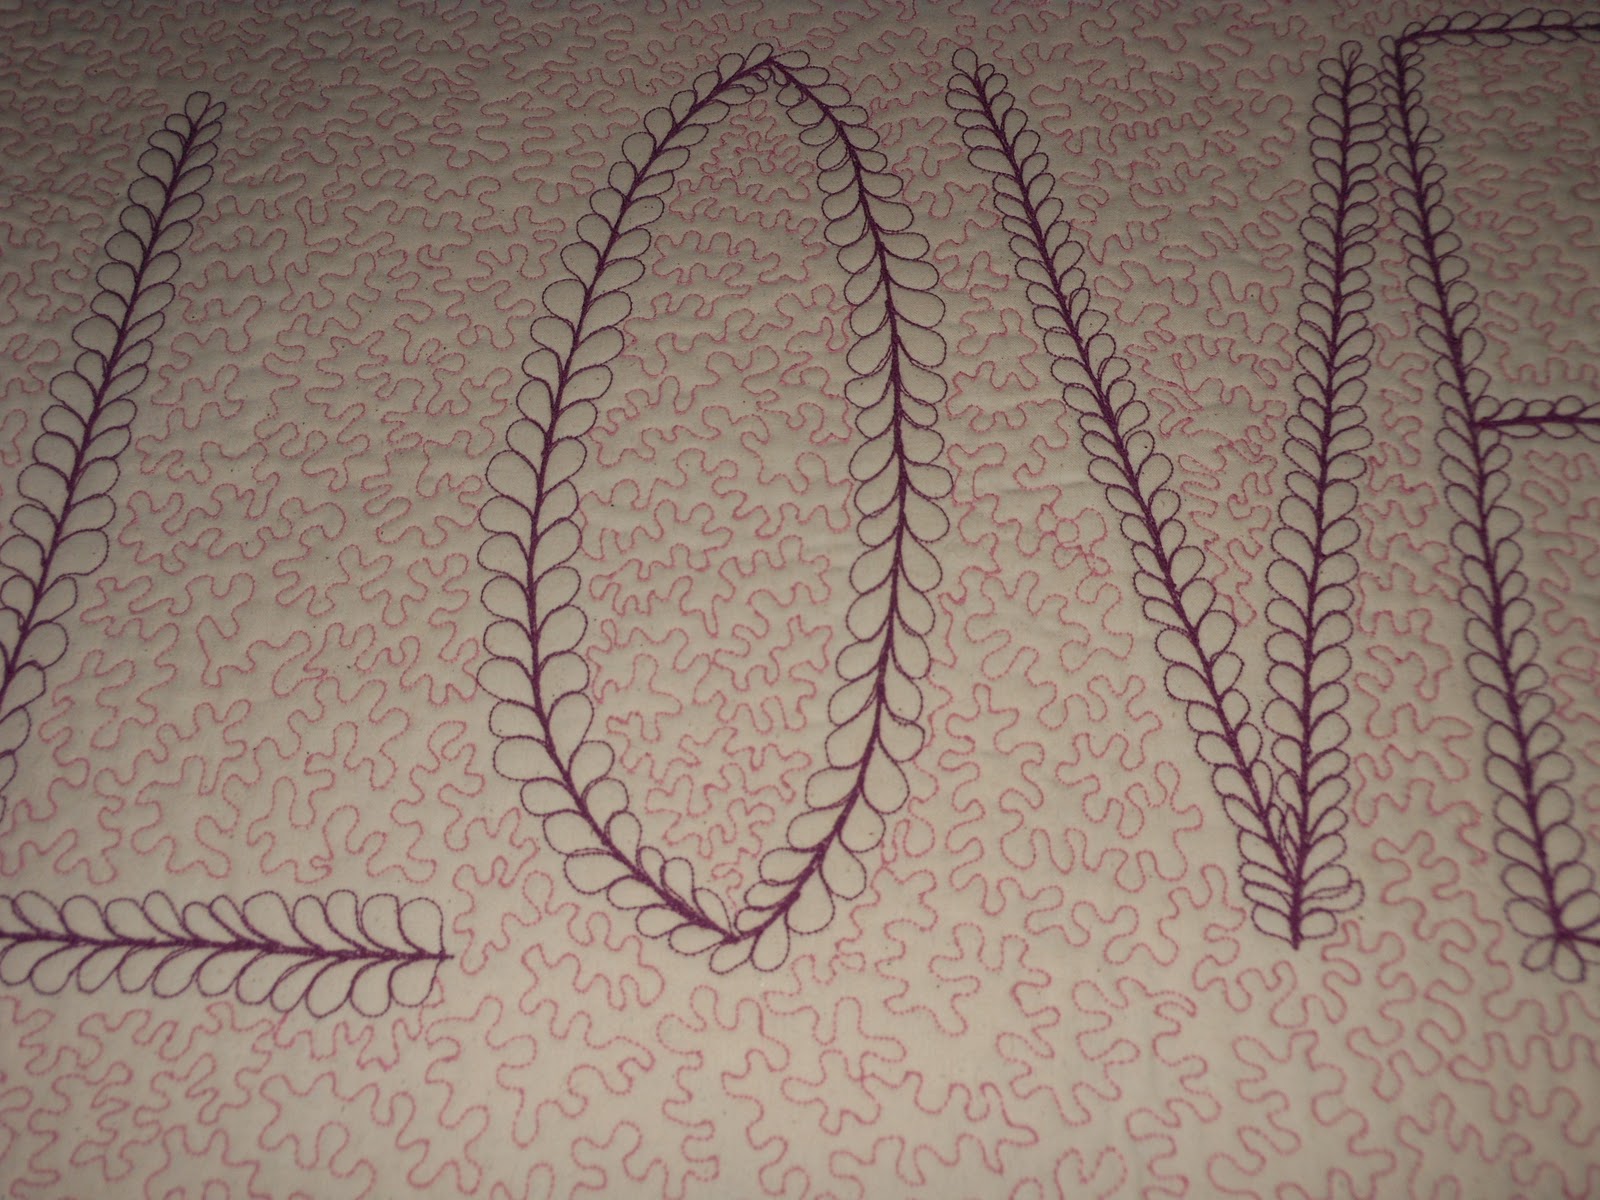
Finished: my LOVE pillow- all done and currently residing on my couch.  The lovely BF gave it a try yesterday with a short nap on the couch and reported that it was very comfy and he likes it a lot.  I am very pleased to hear this! 


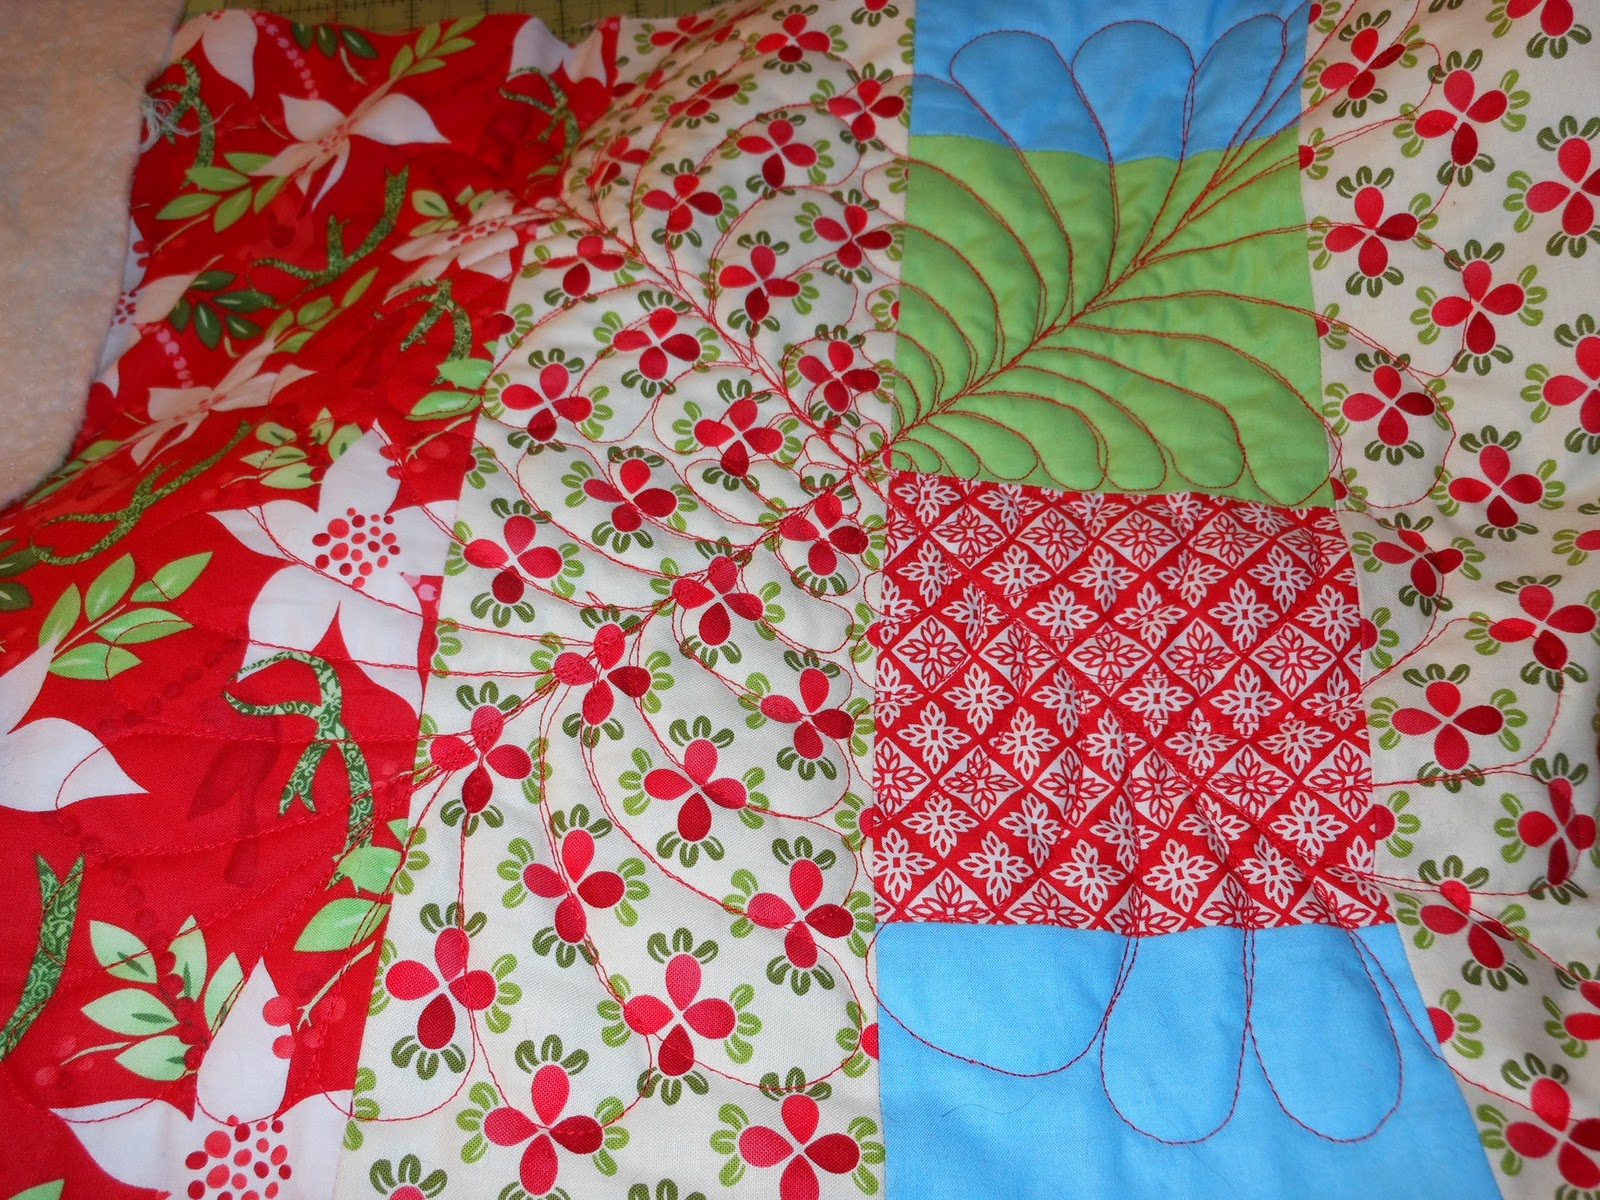
In Progress: my Amy Butler Love Tube quilt- went from just having my Jelly roll strips sewn together to the blocks all cut, ironed, pieced and voila- finished quilt top.  This is quickly becoming one of my favorite quilts yet and the method for piecing it was genius... I will talk more about the progress and how I put it together very soon.   I cannot wait to quilt this baby- I know just how I want to do it and my fingers are itching to get started- I think I will have to wait for the weekend though before I get the chance.

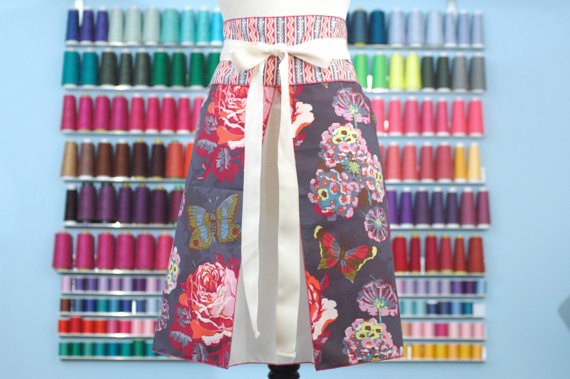
And a Winner!  Last week I hosted a giveaway for a free apron on my blog- from my etsy shop AtomicAprons.  The lucky winner was randomly drawn and is SARAH, so Sarah send me your info and your choice of aprons and I will get that right out to you.  Thank you to everyone for entering and your kind comments. 
I am linking to Work in Progress Wednesday over at Freshly Pieced.  Thanks Lee! 

Sunday, January 29, 2012

Love Pillow FINISHED... and how I put it all together

Well it has been a long time coming (relatively for me) but I finally got this pillow finished.   I am an impatient sewer- I like to have things done and they nag at me mentally when things go unfinished.  I am just not the type to have several WIPS at one time, never have been one to read more the one book at a time- just not that girl.  I digress... So this week has been crazy hectic- and I haven't had any time until last night to get to work on this pillow... I get very cranky when denied sewing time too long and my lovely BF actually told me to get it done so I could be happy again.... (who Me?)  I promised I would show you all how I put my quilted pillows together- but realized quickly that this is not my favorite way to put them together, but my second favorite.  I really HATE sewing on binding- so my favorite method only uses binding on the envelope closure and not on the edges.  But this pillow being whole cloth really needed a nice binding frame I thought, so I suffered through sewing it all on there to get her done.  Overall I am very pleased with the result.  I will show you how I made it but please keep in mind this is only my second favorite pillow method... I will make another pillow soon to tell you about my favorite method- which is more innovative and bottom line easier.... so stay tuned for that.
fat quarter cut in 2 pieces for the envelope closure

muslin strip sewn to the thinner side to make the closure overlap properly

quilt sandwich- love the cherry insides!

big panel quilted

smaller panel quilted

making the binding strips

pinning the binding to the right side first and then using a quarter inch seam sewing it down

press it down flat

fold over to the wrong side and press again

secure with binding clips and stitch in the ditch on the front side

don't forget to use lots and lots of clips- the more the better, and sew slow!

all finished, without pillow form

the back with no pillow form

the back all stuffed with pillow form

and the front all stuffed and ready to squeeze!
First I cut my back pieces (top piece, batting and bottom piece) in 2 rectangles.  Here I used a fat quarter for the back but it didn't overlap enough as my pillow is around 18" square.  So I took a strip of muslin and sewed it to the end which would hide in the envelope.  I like my envelope closures to overlap by around 6"  This one ended up being more like 7" which made it a bit hard to stuff.  Once I have those pieces all cut and sandwiched I quilted them with a meandering stipple.  Next I sewed binding to the edges of the pieces on the sides that would overlap.  I did this by machine sewing the binding to the right side, and then pressed the seam to the back and used lots of binding clips to secure them.  Then I carefully and slowly stitched in the ditch on the front side again to secure it to the back.  My binding strips were 2" wide (before folding in half) and using a quarter inch seam I was able to do this without any trouble.  This might be tricky for those not well versed in machine sewing binding to both sides of their projects.  Good pressing and lots of binding clips work well for me, but if you have trouble with this then hand sewing on the back side is another good option.  Once my pieces were bound I overlapped them and put my front piece on top of the wrong side and squared them all up.  I then zigzagged all around the edges to make them very secure and also nice and flat.  I then used the same binding method to sew the binding to the outer edges of the pillow.  I only had a few gaps that didn't quite catch in the stitch in the ditch step- those I hand sewed down.  I then stuffed with my pillow form (goose down on this one) and VOILA- all finished, love that LOVE pillow!

Wednesday, January 25, 2012

Work in Progress Wednesday and a Giveaway!

Hello Ladies and Gents! 

It has been a pretty uneventful week for me sewing wise.  I have been helping my lovely BF get his new Etsy shop up and running and it has left me with precious little time for other projects.  I am happy to do it though as he has always been a huge supporter of all my creative endeavors- it really is nice to be helping him for a change.  I did manage to get my first whole cloth quilting adventure started though- I am making a pillow for us and decided to try my hand at whole cloth quilting.  Though it isn't perfect I really enjoyed quilting this and look forward to continuing this method in the future, hopefully getting better and better.  You really can't hide when you quilt this way- if your stitches are off even a little then it is very noticeable, but I think that makes me focus in a whole new way- and will only allow me to be a better quilter ultimately.  The pillow front is done and I need to quilt the back pieces and get her all put together.  Hopefully I will have that done very soon so I can show off the finished product.  Now what was that I said about a giveaway? 
In the spirit of new and old (for me) etsy stores I thought I would share something from my shop- AtomicAprons.  You can see more of my shop HERE .  I am giving away a half apron from my shop- of the winners choice, and there are like 65+ to choose from in there, so it should be fun picking your favorite.  All you need to enter the giveaway is to leave a comment below.  If you follow my blog leave a second comment stating that and you will have 2 chances.  The drawing will take place next Tuesday night and I will announce the winner in my next work in progress Wednesday.  To make the commenting fun why don't you tell me what your favorite item ever purchased on Etsy is? 
Here are my stats for the week
finshed: Nada
in progress:  Love Pillow

                   Amy Butler Love tube quilt
I am linking to Lee's Work in Progress Wednesday

Sunday, January 22, 2012

Whole Cloth LOVE


This weekend I find myself wrapped up in a new project- something I have never tried before but always wanted to.  This is my first time doing a whole cloth quilt- er pillow actually.  I have major love for pillows when trying out a new technique- the smaller scale makes the projects seem so much more achievable and who doesn't love a pretty quilted pillow?  Well I sure do!  So if you've never heard of it before a whole cloth quilt is the process of using one piece of fabric (typically a solid) and quilting the heck out of it, making your quilting the design.  Often times you will see these with the thread matching the solid fabric so the design looks fairly subtle unless you look really really close.  I am not such a fan of this idea because I want to see the quilting- from near or far.  So I chose some bright contrasting threads to make the design pop.  I started with the word LOVE and made the letters look like feathers- then did a small stipple stitch all around those letters to finish the design.  There were definitely some sew right and sew wrong moments in this project.  The V and the E ended up too close together- so close I couldn't stipple through the tops and had to break thread- SEW WRONG... ahh- I had a lump in my throat that made me want to throw in the towel when I saw that.  But, remembering where I want to go with this blog and how I want to show others what I have learned I pushed forward and will remember to leave enough space between my letters next time.  The sew right moments are there too- I have never done such a small stipple stitch and I think for a first time it looks pretty good.  I have also never seen anyone do letters with a feather design like this and am very pleased with the design.  For a first whole cloth project I think it turned out pretty great and will definitely enjoy this pillow on my couch when it is all done.  Now I just have to quilt the back pieces and put it all together.  I will show you all how I make my pillows in the next post.  And now I can say I have caught the whole cloth bug and have many more designs I would like to try swirling around in my head.  Whole cloth LOVE!

Friday, January 20, 2012

Happy Birthday to my furry babies!


Oh the joy my puppies have brought to my life- words cannot express.  Today they turned 3 years old and I can't stop thinking about all the happy memories and times they made me smile when I felt no smile was possible.  To think that we found them about to be given to a shelter living in a back yard at 4 months old- never having been invited inside a home, not knowing their names, and being generally very afraid of humans- just blows my mind.  With lots of love and care we taught them all they need to know about being happy puppies and every day they return the favor 10 fold.  I am a truly blessed mom.  So today we celebrate them with an extra long walk in the park, some new squeaky toys, and best of all their favorite home made treats.  Our guys have a sensitivity to grain, so we make them treats rather then buy expensive grain free treats at boutique pet stores.  Their absolute favorite is chicken breast, sweet potato and chicken liver- which we food process until it is a smooth paste, then dehydrate in a Nesco American Harvest food dehydrator- until it becomes cracker texture.  They absolutely love it and though it costs around 10 dollars per batch we get 2-3 weeks of treats- so it is a very good deal.  Happy birthday to my Juki girl (yes I did name her after my Juki Serger) and Moosey boy aka Good Buddy- and many many more!

Wednesday, January 18, 2012

Work in Progress Wednesday... my very first one

Oh how I am so excited to finally participate in WIP Wednesday.  I have been  a fan of Lee's blog Freshly Pieced for over a year now and every Wednesday I looked forward to seeing what she and many other bloggers had been up to, and what they hadn't gotten to yet.  I dreamed of someday participating in it and now that I have my blog I can!   So here goes-
Finshed this week- my Cross Eyed 9 Patch quilt with Kate Spain's flurry fabrics and some 12 days of Christmas on the back.  It is all done and I am so pleased with it!

Still in progress-
Tube quilt with Amy Butler Love Jelly Roll
Love pillow - my first whole cloth quilting experience

so that is it for now, I am usually not one to let projects linger around here too long- and will be talking more about my unfinished works in the coming days.  There is a big smile on my face to be participating in WIP Wednesday for the first time- so Thanks Lee!

I am linking to Freshly Pieced  Wip Wednesday

Tuesday, January 17, 2012

unconventional binding


So I got my quilt all bound and finished.  I have chosen an unconventional binding method that I have grown to really love.  I have done several quilts and small projects like place mats this way- and besides being very easy I really love the look as well.  Instead of sewing a folded strip around the edge of the quilt and then hand sewing it to the other side- the traditional method- I have found that if I trim the back of the quilt exactly 1 inch wider then the front all the way around I can then make a half inch fold and then fold again on the front.  I then sew the edge of the binding down with my machine, which means no hand sewing.  The trick is that when you come to the corners you have to take the folded edges and fold the corner toward the middle- so that leaves you the right angle for a mitered corner.  This really is an easy way to bind your quilts and the nice thing is that the back then wraps around the front to frame your quilt nicely.  With this particular quilt I did some fun piecing on the back which is very nice to see on the edges of the front of the quilt.  One of the things I have found through my experience in quilting is that if a particular method doesn't work for you then it isn't very hard to find an alternative option.  I encourage everyone to do what works for them and to not be afraid to try new things and break away from convention- you might just find a great new technique that works really well for you!

Monday, January 16, 2012

barefoot quilting...


all ready to mark my lines


the back


more back shots


So on to my very favorite part... quilting!  I love to free motion quilt.  I am guilty of making simple quilt tops to hurry through the piecing and get to the quilting- It is an activity I truly do enjoy.  I just started free motion this past May when I got a darning foot for my machine for my birthday.  I clicked with it right away- and it took my quilts to a whole new level.  If you haven't started free motion quilting already then I strongly recommend you try it.  For this quilt I chose to do a feathered X on each block- which to me looks like snow flakes- perfect for my Christmas theme.  I learned this pattern here and have really enjoyed using it on several quilts.  I have a feather obsession and this is one of my favorite feather patterns to quilt.  I really enjoy how it fills a block so perfectly- for this quilt I had to mark the horizontal and vertical lines through each block- I did so with a disappearing ink pen.  I have used the feathered X to quilt pinwheel blocks as well and I love how with those all the seam lines become your edges and you don't have to do any marking at all.  Once my lines were marked I took off my shoes and started quilting my heart out.  Yes, you read that right- took off my shoes.  That tip- quilting barefoot- is the best free motion quilting tip I could ever give- take off your shoes!!  You will be amazed at the subtle nuisances of speed control you can achieve with bare feet.  When my shoes are on I can go three speeds at best, slow, medium and fast- but with no shoes it is easy to "drive" your machine like you drive your car speeding up during the straight areas, slowing down with the curves.  It has made my stitches so much more even and better looking.  It also allows me to feel in control of my machine which is so important while quilting.  Yes ladies and gents, while quilting, try taking off your shoes! 
     I got the whole top quilted in 2 sessions- about 3 hours each.  I did all the red one night and the next day got all the green done.  I found this pattern a bit harder to achieve on such a large scale.  My blocks are around 14" and when I got to the bigger areas it was hard to keep everything moving perfectly.  The quilting isn't 100% perfect- but I am still learning and am pleased with the results regardless.  All part of the journey as I like to remind myself.  I have to say I was a bit sad to be finished with the quilting- ahhh it always ends too soon for me.  I find it funny that I waited so long to try free motion quilting.  For me it made everything so much more fun and gave so many new opportunities for creativity.  Please do give it a try if you haven't already- and stay tuned for more quilting tips in the future.  Now on to the binding- but we will talk about that next time.