Wednesday has come again and I have some fun things to share from my sewing studio this week. I spent some time last week making 4 reverse applique letter pillow covers for my Sister in Law's birthday- which is tomorrow. I am super excited to see what she thinks of them. They spell out HOOD because she just bought a new vacation home in Hood River OR, and I thought it would be really fun to have these on her new couch. I thought of so many other fun things you could do with these reverse applique letters that I decided to make you all a tutorial- It isn't terribly hard, but if you have never done reverse applique then there are certainly a few tips and tricks that might help out. My Tutorial is Here. I also got up the gumption to try my hand at a paper pieced Circle of Geese block- thanks to Tartankiwi's gorgeous block she made. She and I got to chatting about it and I confessed I was scared to try something so challenging, having never one paper piecing before- she challenged me to try it and promised I could do it. I did try it, an though it wasn't easy it was very gratifying to get that lovely block done- I am very proud of it an think I will turn it into a tiny quilt wall hanging for my studio to remind me to challenge myself to conquer what scares me. Thanks to you Juliet for encouraging me. Here are some pics of my pillow covers and my block- I apologize for the wrinkly pillow covers- I need to iron them before wrapping them up- they have been folded for a few days now and are looking a bit crinkled!
My finished projects are the Circle of Geese Block and these HOOD pillows-
In Progess- My first customers quilt- making lots of progress but not done yet.
As Always I am linking to Freshly Pieced WIP Wednesday
Also my dear friend and fellow blogger Marisa is giving away one of the aprons from my etsy shop as well as a few others goodies on her blog this week- if you would like to win an apron or are interested in tons of great gluten free recipes please stop by her blog and have a look! The Food Sensitive Foodie
Showing posts with label tutorial. Show all posts
Tuesday, April 3, 2012
Sunday, April 1, 2012
Reverse Applique Letters Tutorial
Last weekend I spent my sewing time creating 4 pillow covers for my sister in law's upcoming birthday. I typically don't go this crazy for birthdays but there are 2 special reasons why I was inspired to give this gift. My sister in law recently closed on a lovely vacation home in Hood River OR, and she and her family have come down from Seattle to visit us for her birthday. This present is really a combination housewarming gift and b-day gift. My Sis in law really likes simple design, and this is a girl who truly loves letters and words in her decor- her new home is very modern and clean lined, so I backed away from my typical bright over the top style and toned it down a bit so these would look great on her sofa in her new living room. I am really hoping she likes them. I killed two birds with one stone and decided to create a tutorial for you all about reverse applique and how I made my letters. This is a super fun and fairly easy technique and could be used in so many ways. I can imagine a big quilt with the whole alphabet, or a quilt with a special quote ect- the possibilities are endless! If you do make anything using this tutorial please shoot me an email with a pic and let me know, you just might find your creation featured on my blog! Okay, I am doing this through pictures this time so here goes-
To begin you will need 2 contrasting fabrics, I used a solid gray and a lime green print. You will want to have equal amounts for the blocks (if you are making pillows like I did you will want extra of the solid for the backs) I made my pillows 16" finished, but I started out with 17" squares of each fabric- this gave me extra room to square them down to 16.5 inches and then make a 16 inch pillow (or block)
| a few squares- note this is the top piece of your applique block |
| next you will want to find the center of your blocks and press a little crease so you can line up your letter |
| next you will want to trace around your letter carefully with a disappearing or water soluble marker |
| here is my H all cut out, notice how I trimmed down the seams on the inside corners of my letter so when I fold my seams back they won't be bulky in the corners. |
| Here is my H all pressed and ready to layer with the print fabric behind it- came out pretty good eh? |
| here is the front of my O after turning the seams but before adding the center part of it. |
| this is it with the center part added |
So that is it- pretty simple! If you are handy with an iron and take your time you will find these are an easy and fun project- Just imagine doing a bride and grooms last name for a wedding gift- or a new baby's name. Even if you don't have a sewing machine this could be accomplished with hand sewing around the letters. Hope it inspires you and you give it a try- three cheers for reverse applique!
Tuesday, March 27, 2012
WIP Wednesday #11 a new tutorial for Jigsaw Puzzle Quilting
This week I have been doing lots of sewing, unfortunately mostly for a birthday gift that won't be received until next week, so I can't share that yet, but as a teaser I have an upcoming tutorial on how to do letters in reverse applique- which was lots of fun and had a really cool effect, so please come back next week for that. I have finally managed to record a video tutorial for free motion quilting my Jigsaw Puzzle design, so have a look- the video is a bit long as I wanted beginners to be able to see the design several times so it really sticks, if you are not a beginner just view the first part and you will have it down. I had a few people ask me how this might work on a postage stamp style quilt- the answer is perfect- no marking lines, just use your seam lines and you are good to go. I made a little pillow in a postage stamp pattern so you can see for yourself how it looks I think the quilting is a bit hard to see in the pictures- but you will get the idea. Also my good friend and fellow blogger Marisa Voorhees is giving away one of my aprons from my etsy shop on her blog, so if you are interested in winning a free apron stop by her blog to get more info on that. So without further adieu here is my first ever video tutorial- hope you enjoy!
as always I am linking to Freshly Pieced WIP Wednesday freshly pieced
Sunday, January 29, 2012
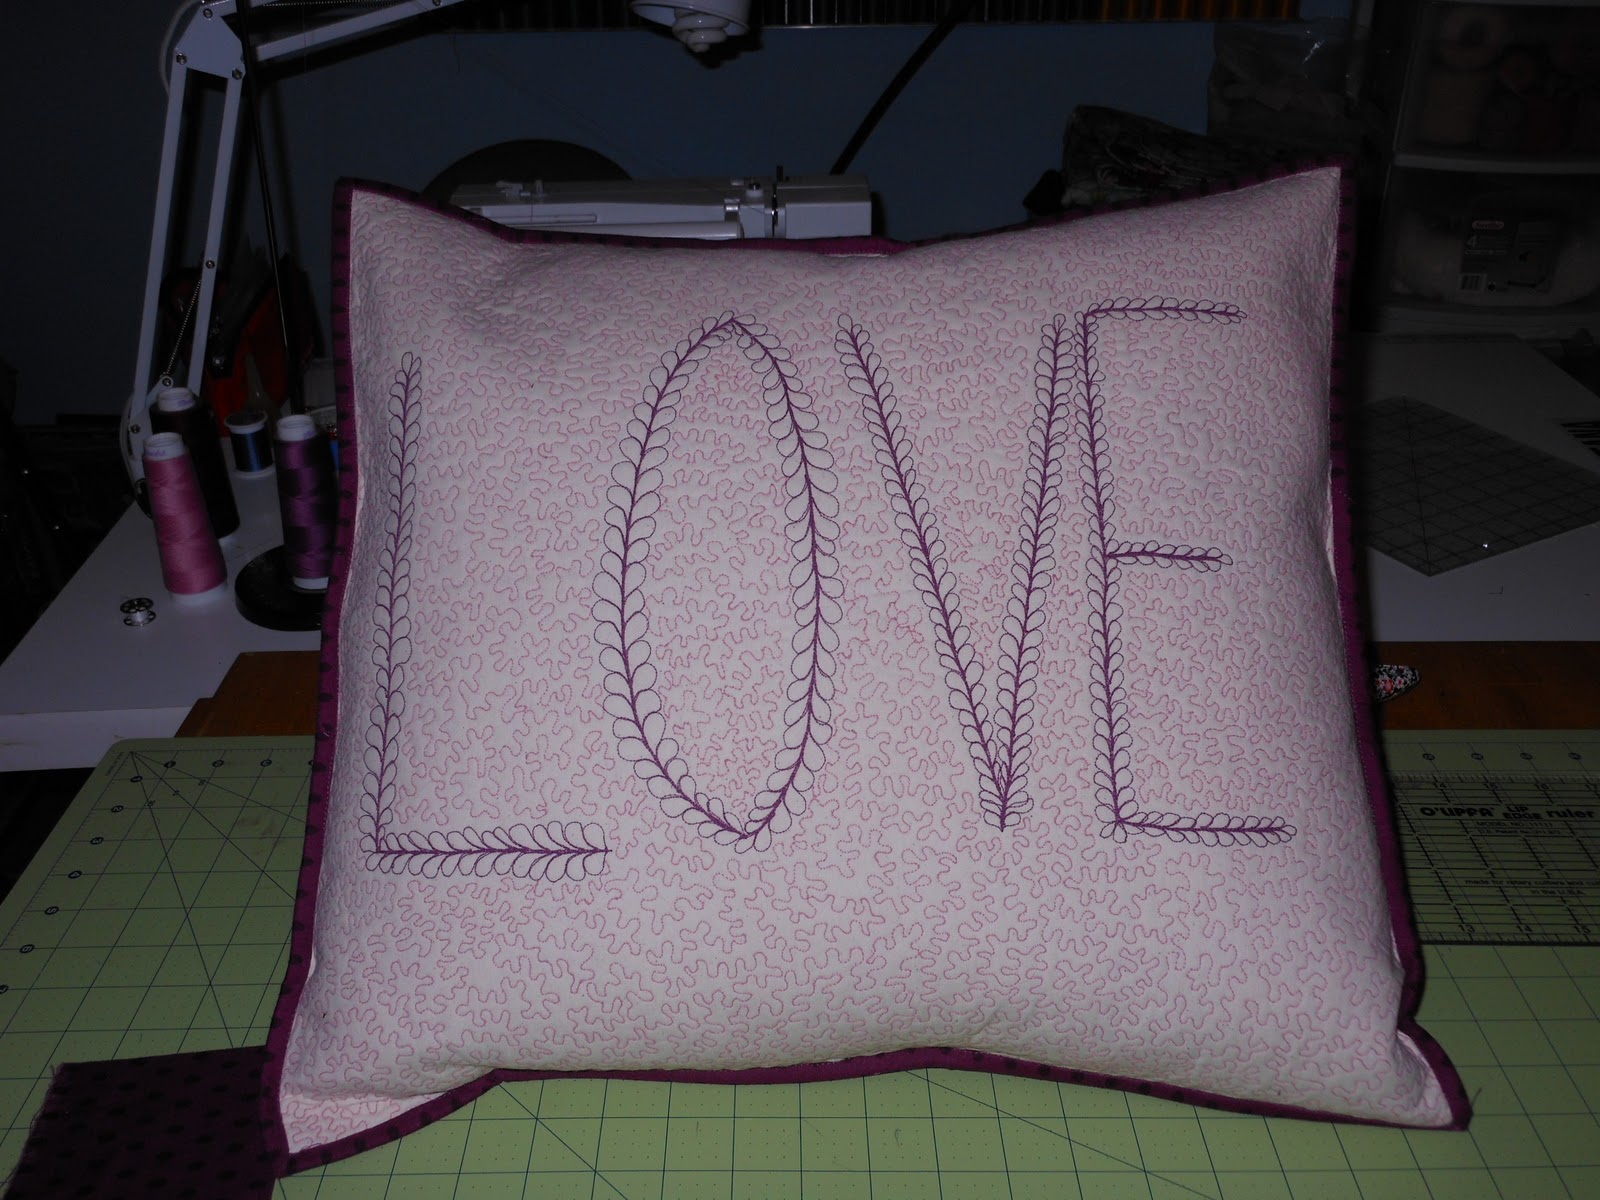
Love Pillow FINISHED... and how I put it all together
Well it has been a long time coming (relatively for me) but I finally got this pillow finished. I am an impatient sewer- I like to have things done and they nag at me mentally when things go unfinished. I am just not the type to have several WIPS at one time, never have been one to read more the one book at a time- just not that girl. I digress... So this week has been crazy hectic- and I haven't had any time until last night to get to work on this pillow... I get very cranky when denied sewing time too long and my lovely BF actually told me to get it done so I could be happy again.... (who Me?) I promised I would show you all how I put my quilted pillows together- but realized quickly that this is not my favorite way to put them together, but my second favorite. I really HATE sewing on binding- so my favorite method only uses binding on the envelope closure and not on the edges. But this pillow being whole cloth really needed a nice binding frame I thought, so I suffered through sewing it all on there to get her done. Overall I am very pleased with the result. I will show you how I made it but please keep in mind this is only my second favorite pillow method... I will make another pillow soon to tell you about my favorite method- which is more innovative and bottom line easier.... so stay tuned for that.
First I cut my back pieces (top piece, batting and bottom piece) in 2 rectangles. Here I used a fat quarter for the back but it didn't overlap enough as my pillow is around 18" square. So I took a strip of muslin and sewed it to the end which would hide in the envelope. I like my envelope closures to overlap by around 6" This one ended up being more like 7" which made it a bit hard to stuff. Once I have those pieces all cut and sandwiched I quilted them with a meandering stipple. Next I sewed binding to the edges of the pieces on the sides that would overlap. I did this by machine sewing the binding to the right side, and then pressed the seam to the back and used lots of binding clips to secure them. Then I carefully and slowly stitched in the ditch on the front side again to secure it to the back. My binding strips were 2" wide (before folding in half) and using a quarter inch seam I was able to do this without any trouble. This might be tricky for those not well versed in machine sewing binding to both sides of their projects. Good pressing and lots of binding clips work well for me, but if you have trouble with this then hand sewing on the back side is another good option. Once my pieces were bound I overlapped them and put my front piece on top of the wrong side and squared them all up. I then zigzagged all around the edges to make them very secure and also nice and flat. I then used the same binding method to sew the binding to the outer edges of the pillow. I only had a few gaps that didn't quite catch in the stitch in the ditch step- those I hand sewed down. I then stuffed with my pillow form (goose down on this one) and VOILA- all finished, love that LOVE pillow!
| fat quarter cut in 2 pieces for the envelope closure |
| muslin strip sewn to the thinner side to make the closure overlap properly |
| quilt sandwich- love the cherry insides! |
| big panel quilted |
| smaller panel quilted |
| making the binding strips |
| pinning the binding to the right side first and then using a quarter inch seam sewing it down |
| press it down flat |
| fold over to the wrong side and press again |
| secure with binding clips and stitch in the ditch on the front side |
| don't forget to use lots and lots of clips- the more the better, and sew slow! |
| all finished, without pillow form |
| the back with no pillow form |
| the back all stuffed with pillow form |
| and the front all stuffed and ready to squeeze! |
Subscribe to:
Posts (Atom)